Here’s a refined and engaging rewrite of your passage, incorporating key insights from the search results to enhance its instructional value and appeal
Step 1. Make Adjustments to Contrast and Exposure
Backlit images tend to be overexposed in areas, so reducing the exposure slightly will bring back details in your highlights.
You will also want to boost your Contrast a bit, too. Backlit images are often hazy, so increasing the Contrast will compensate for that.


Step 2. Add Linear Gradients
Next, I want to add a Linear Gradient (formerly referred to as a Graduated Filter) to the top-right of the image to enhance the sun flare peeking in.
The image below shows the Masks icon and how you can access the Linear Gradient through that panel:

For this image, I dragged the Linear Gradient from the top-right diagonally to about the middle of the image. How far you drag it into your image will depend on the amount of haze you find present in your photo.
The Linear Gradient does a great job of ensuring the filter is spread out evenly so that the effect isn’t choppy but blends with the rest of the image.
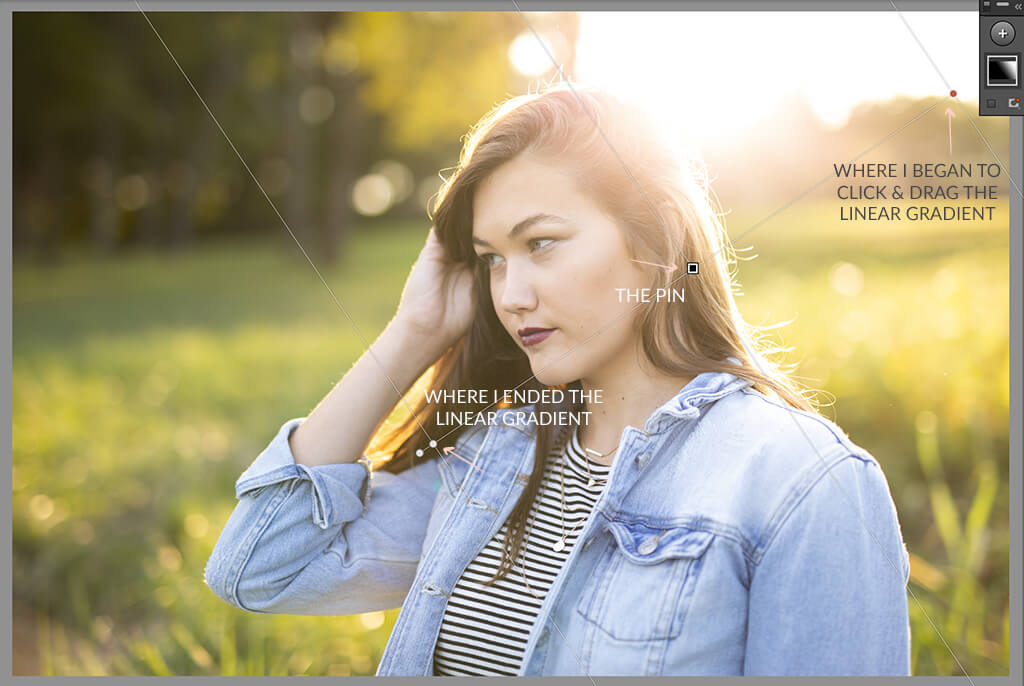

You can see that the Linear Gradient is now affecting the top-right and enhancing the flare in the upper-right corner.
The settings used here include adding some exposure and brightness as well as some warmth, all of which allow the linear gradient to enhance the beautiful sun flare coming from the top-right.

Next, I want to add a second Linear Gradient by highlighting the Masks icon, clicking the “+” at the top, and then choosing Linear Gradient from the options.
For this gradient, I started at the bottom left of the image and dragged it towards the top right, ending somewhere in the middle of the subject.


The settings used for the second linear gradient include decreasing the exposure, shadows, and black sliders to add a bit more contrast and reduce the haze where I don’t want it. This will help make the image “POP.”

Step 3. Adjust White Balance as Needed
Finally, I made an overall global White Balance adjustment to the entire image by pulling my sliders toward the yellow side.
White Balance isn’t a one-size-fits-all scenario of moving your sliders where it looks best for your image, but backlit photos tend to look better on the warmer side of the white balance spectrum.
